Simple game engine for Android written in Java. Supports Android 2.3 (API level 9) and up.
Created as a bachelor’s thesis at CTU in Prague.
Documentation
Complete javadoc for engine’s API can be seen here.
Coordinate system
Left-handed coordinate system with z axis pointing forward, y pointing up and x to the right.
Tutorial
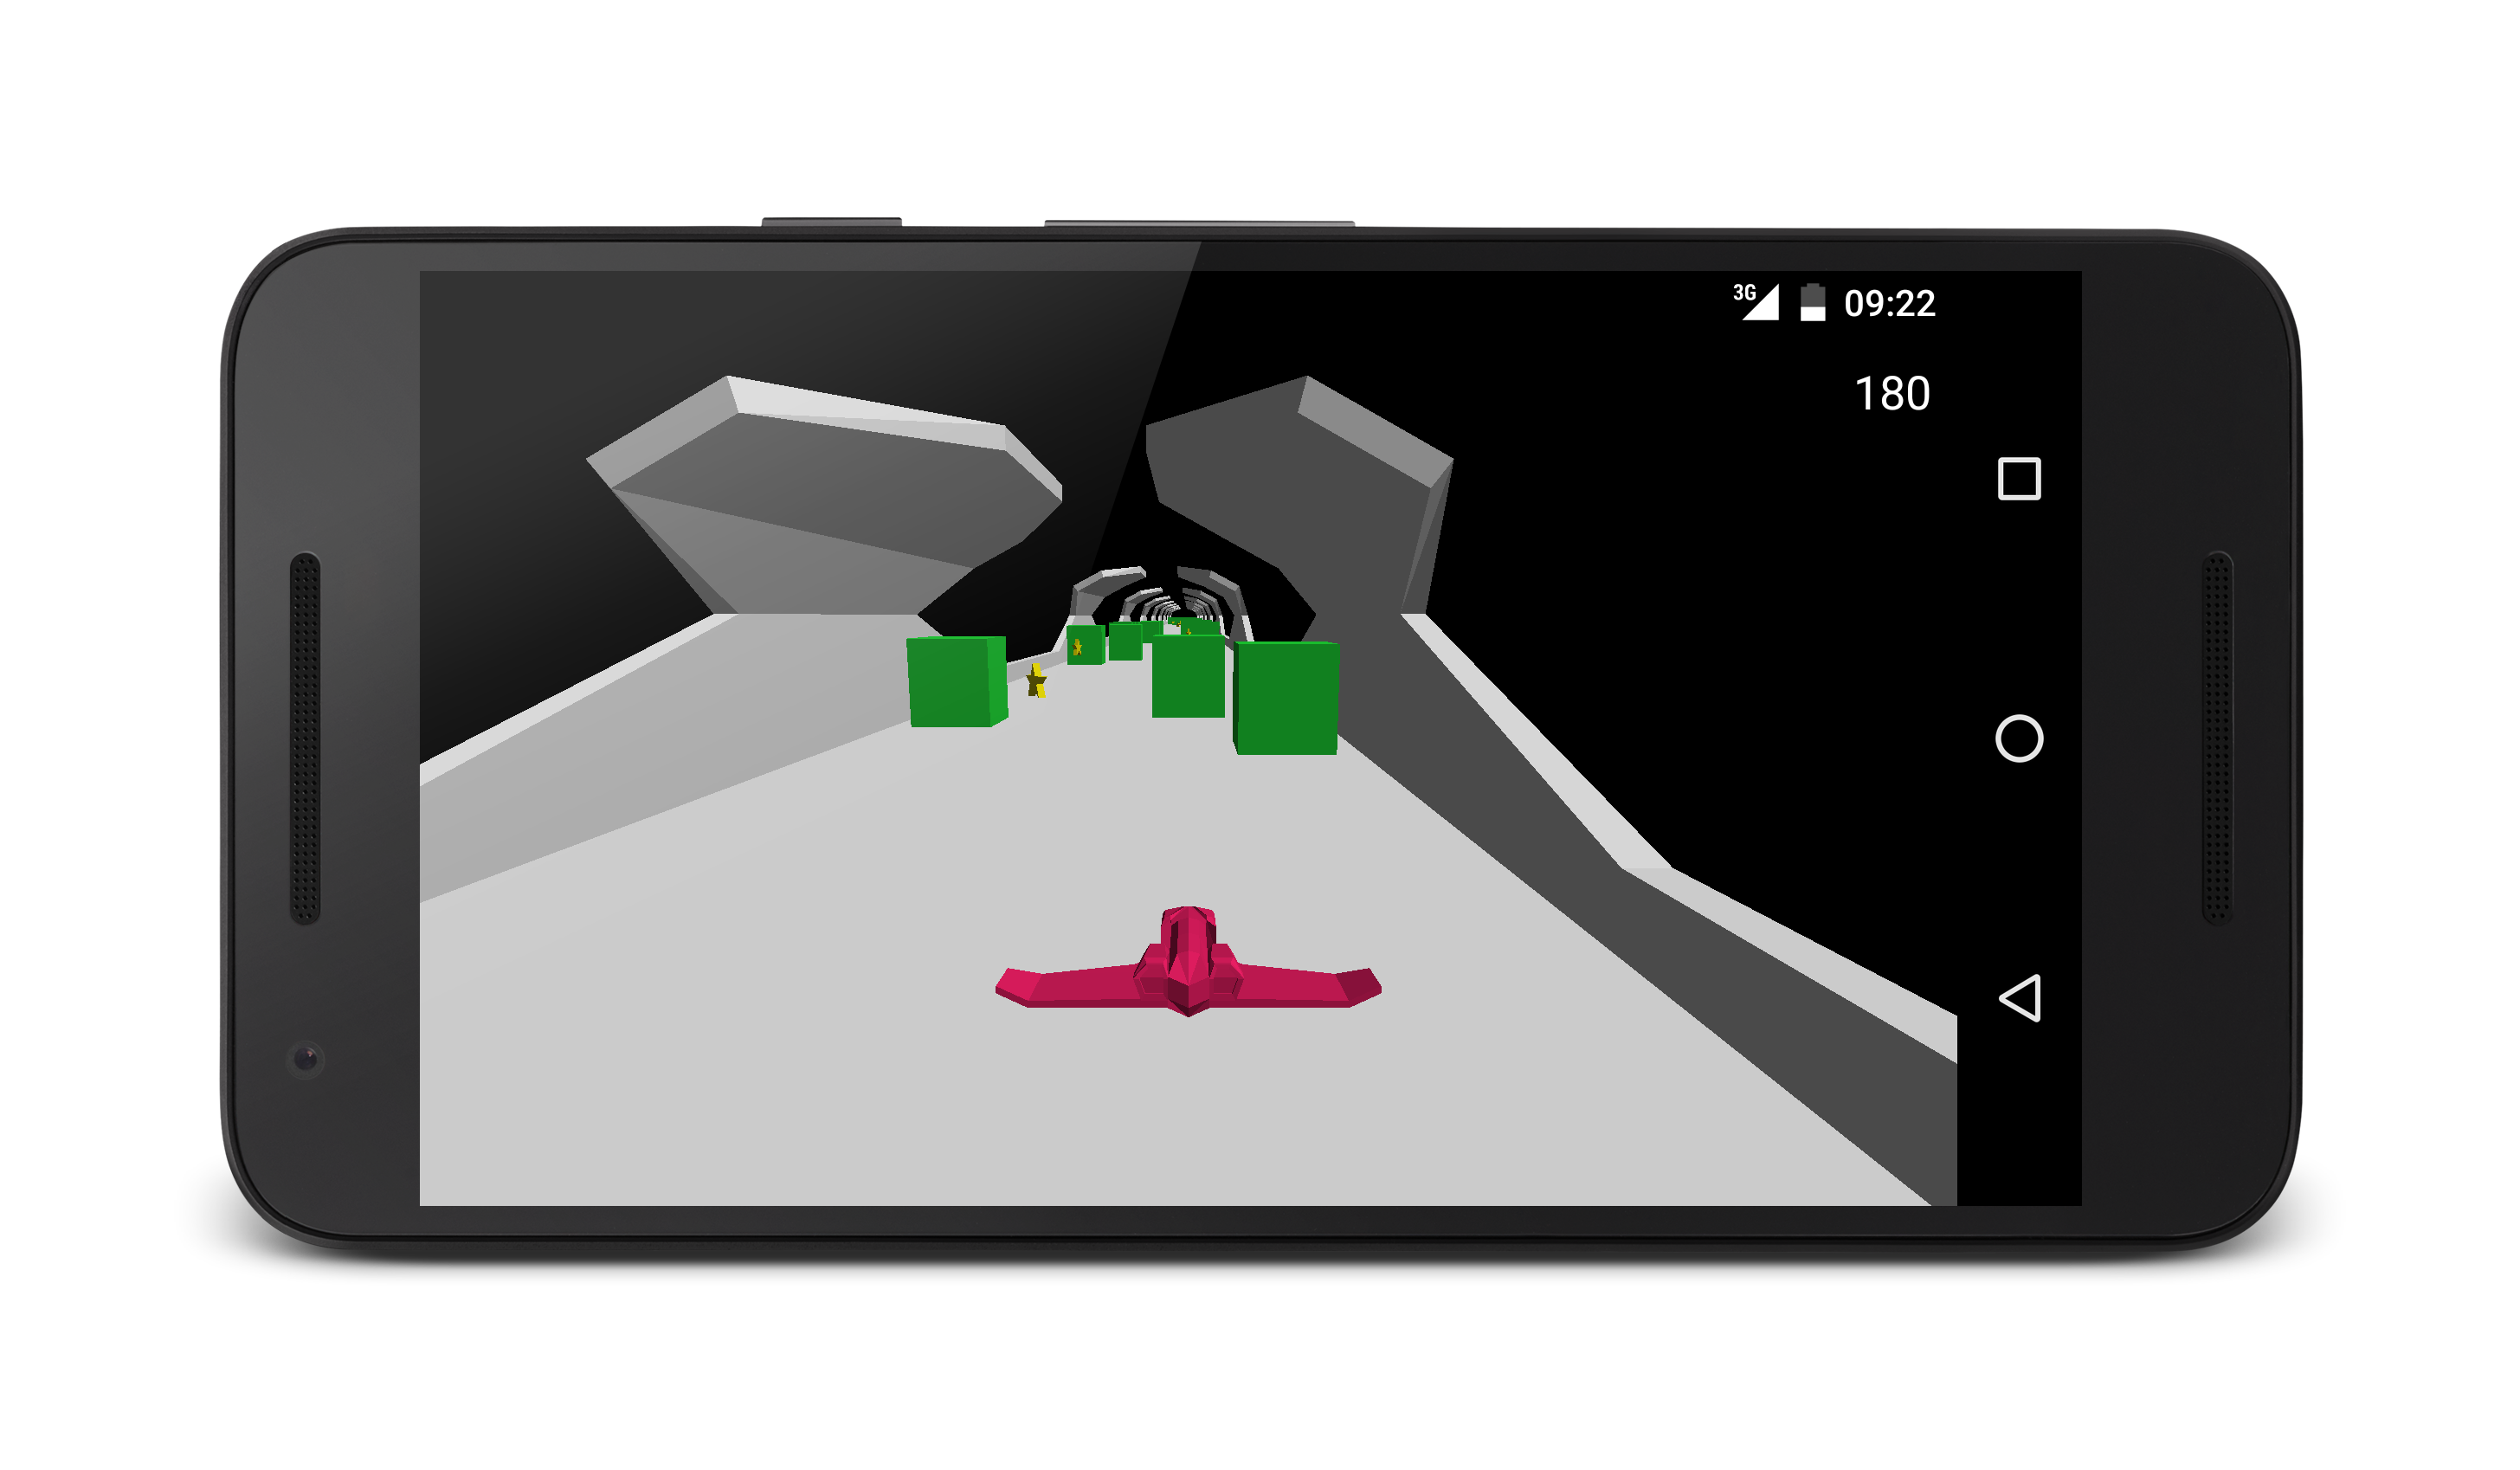
In this tutorial you will create a simple application showing only the engine content. Engine will display an object that player will be able to move using his finger.
For more examples and samples of working projects using the engine check out the sample and showcase project modules. These contain the sample and showcase applications respectively.
Project setup
Create new Android Studio project and either add the whole engine and android-adapter modules into your project, upon which module with your application will be dependent or build the engine as an AAR file and add it to your project.
Now you must add the engine activity to the AndroidManifest.xml. In this tutorial you will add the activity as main application activity, however it does not have to be the main activity.
To add this activity, place the following code into <application> tag of your AndroidManifest.xml.
<activity android:name="com.jakubpetriska.gameengine.api.android.GameEngineActivity">
    <intent-filter>
        <action android:name="android.intent.action.MAIN" />
        <category android:name="android.intent.category.LAUNCHER" />
    </intent-filter>
</activity>
Add scene
To be able to run the application a few configuration files are needed. All engine configuration files are located in the application’s assets folder, specifically in assets/gameengine.
First configuration file that needs to be created is scenes.xml file that needs to be located on assets/gameengine/scenes.xml. This file defines what scenes engine can display and which scene is default. In our application default scene will always be displayed as first.
Create this file with following content:
<?xml version="1.0" encoding="UTF-8"?>
<scenes
    defaultSceneName="main_scene">
    <scene
        name="main_scene"
        sceneFilePath="scenes/main_scene.xml"/>
</scenes>
Content of this file says that our engine has a single scene named main_scene and it is a default scene. Now there is one more thing. Every scene needs to have it’s definition file. This file defines what is in the scene when it is loaded. It can be placed anywhere in the assets/gameengine folder and it’s path needs to be specified in the scenes.xml file for every scene using the sceneFilePath attribute of _
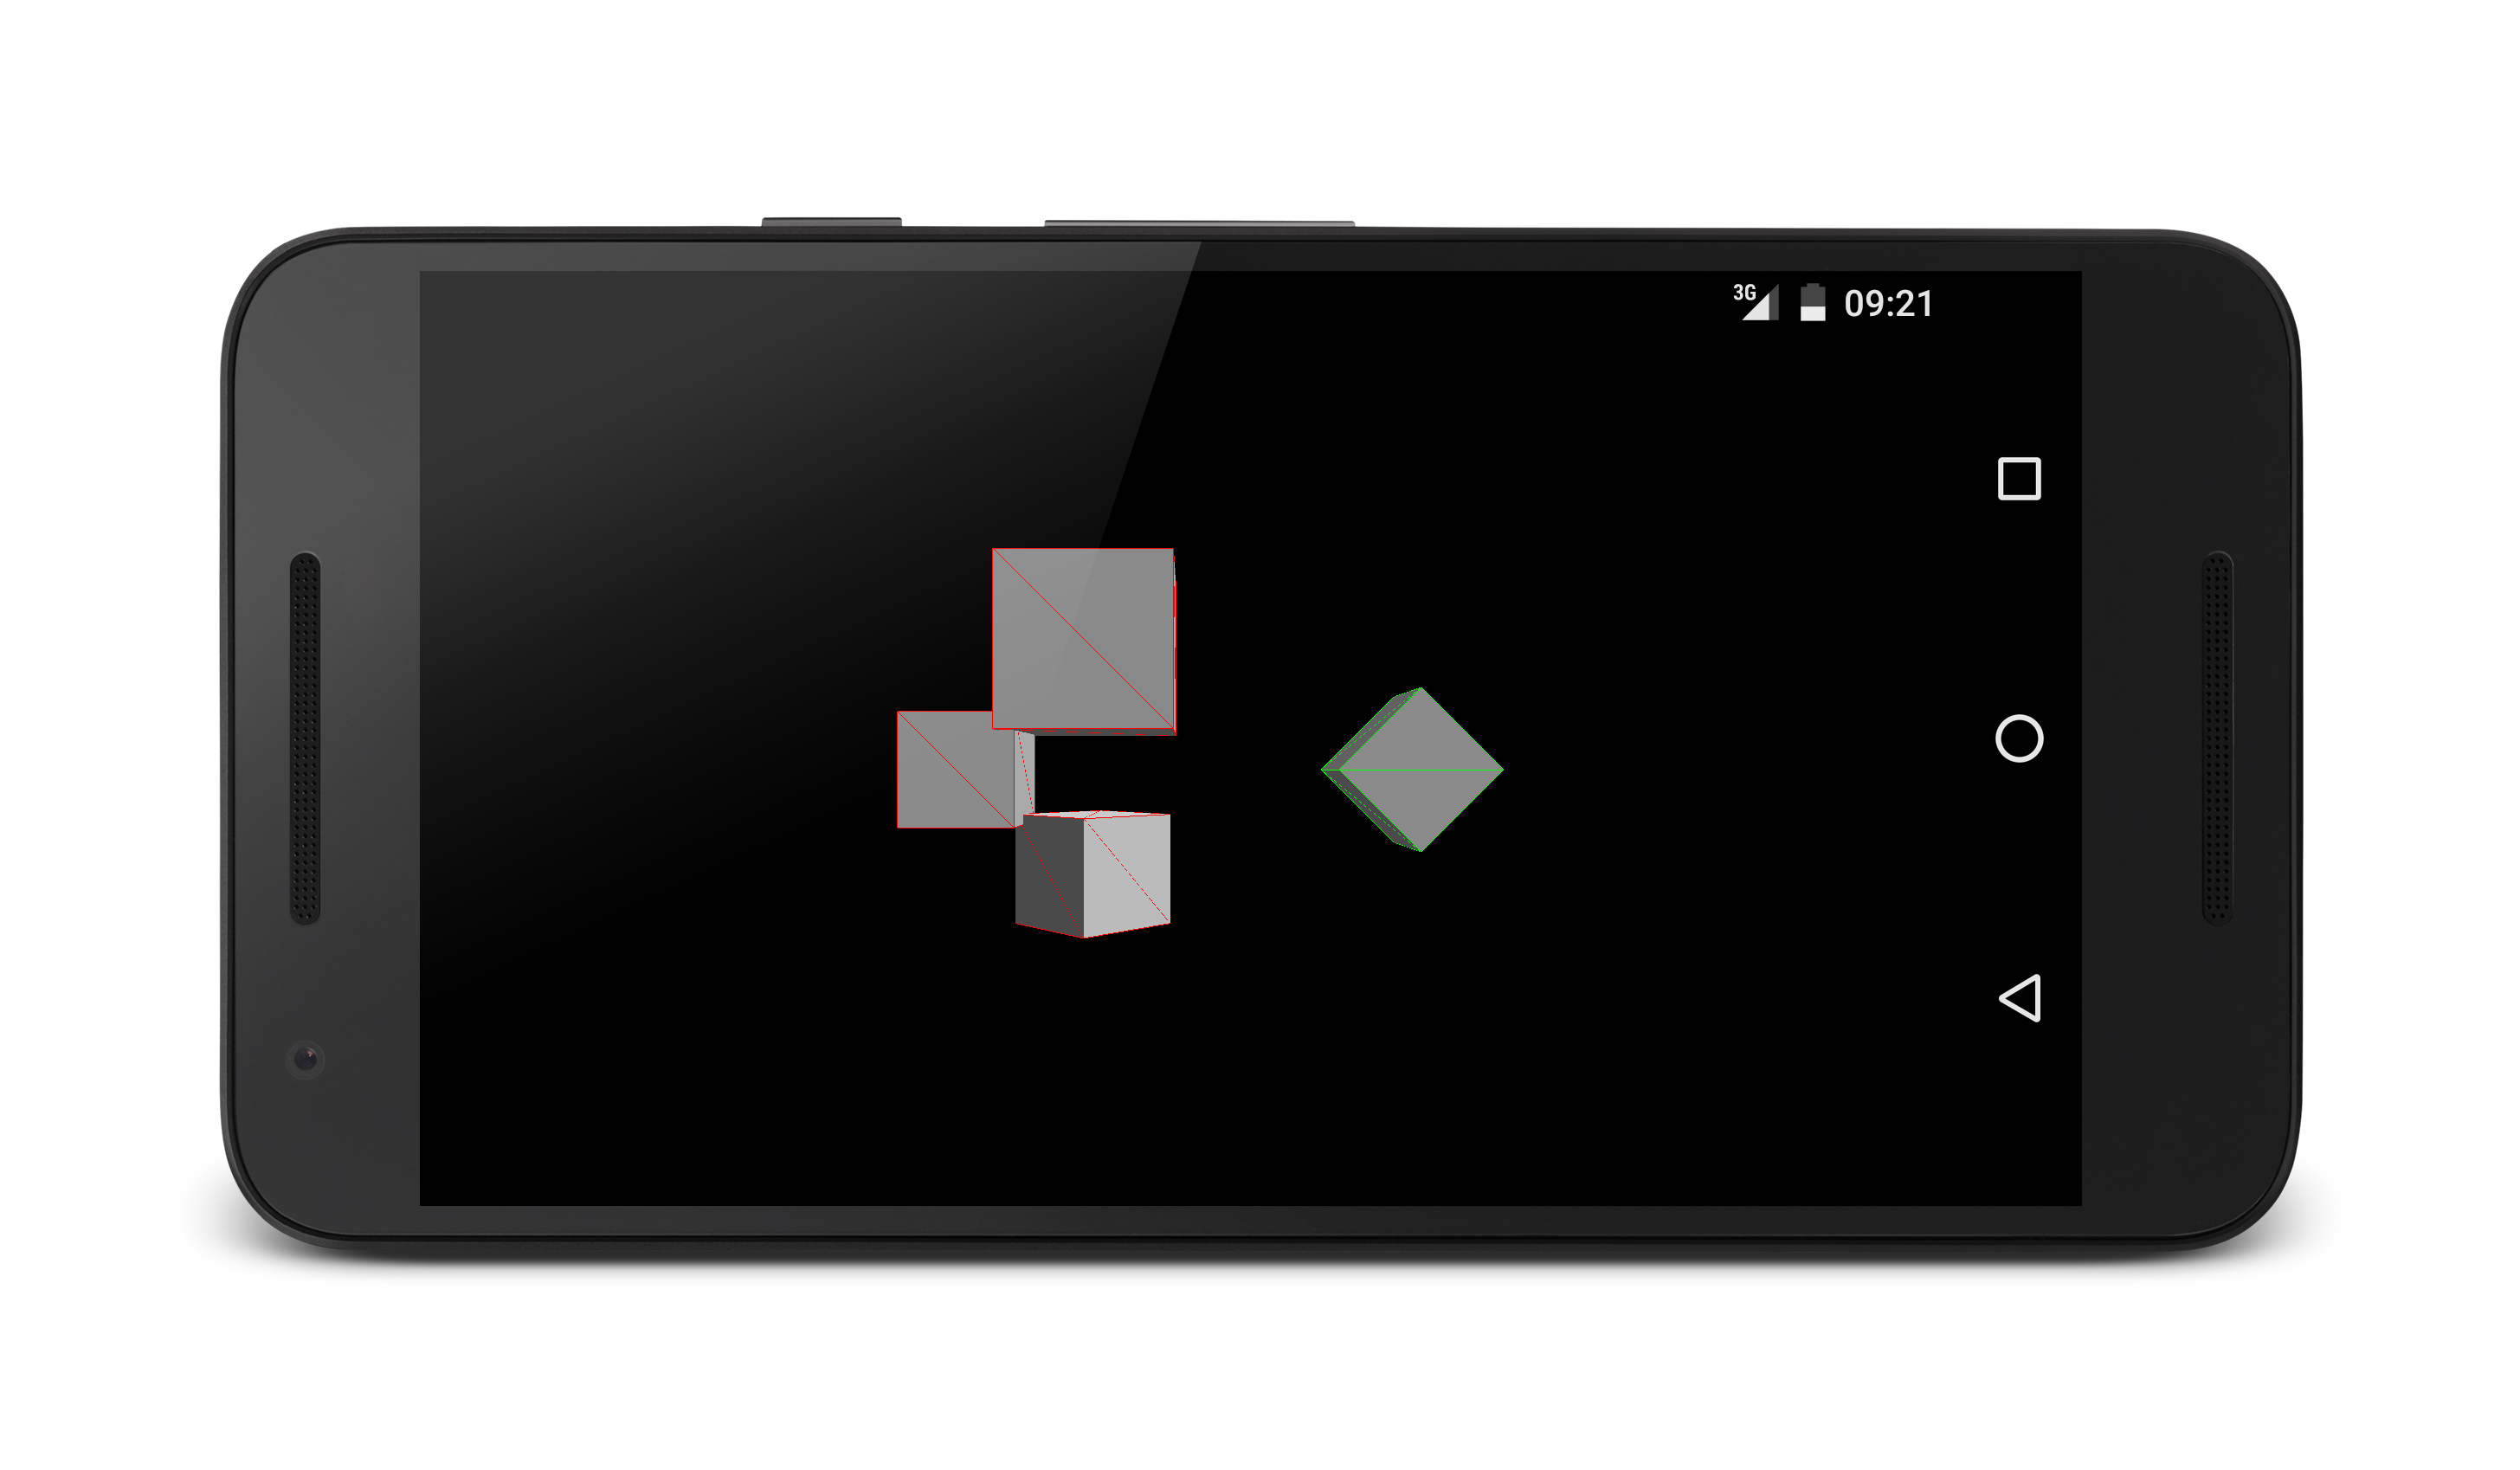
Game engine’s scene consists of objects with components. Objects hold things such as transformation while components add functionality such as rendering a 3D object. Scripts are also components.
In our scene there will be a cube that user will be able to move with his finger. We will create an object on the initial position of our cube that will contain two components. First component will be Mesh component, responsible for rendering the cube and second component will be the script controlling it’s movement. Let’s start with the cube.
Copy the following code into your main_scene.xml:
<?xml version="1.0" encoding="UTF-8"?>
<scene>
    <gameObjects>
        <gameObject>
            <transform>
                <position x="0" y="0" z="10" />
            </transform>
            <components>
                <component type="mesh">
                    <params>
                        <param name="meshPath">cube</param>
                    </params>
                </component>
            </components>
        </gameObject>
    </gameObjects>
</scene>
You can see that _
Project can now be built so please go ahead and test it.
Control the cube
Application will use the touch input to move the cube. First we need to add new component that will control the cube and attach it to the cube’s object. Create new java class and extend the Component class from engine’s API. Now head to your main_scene.xml and add new component into the <components> tag. Add a type attribute to the new component and put in the full class name, with package, of your new component. In our example project this line looks like this:
<component type="com.jakubpetriska.gameengine.samples.basic.CubeController"/>
In order to access touch input in our component we need to use the Application class from engine’s API. This class acts as a container for objects that provide all the important functionality. Reference to the instance of Application is stored in every Component and it can be obtained with calling the getApplication() method of Component. This is the Component that we’ll use for controlling our cube:
import com.jakubpetriska.gameengine.api.Component;
import com.jakubpetriska.gameengine.api.Time;
import com.jakubpetriska.gameengine.api.Touch;
import java.util.List;

public class CubeController extends Component {

    private static final float MOVEMENT_CONSTANT = 0.2f;

    // Save the last touch position to calculate position deltas
    private float mLastTouchX = -1;
    private float mLastTouchY = -1;

    @Override
    public void update() {
        Time time = getApplication().getTime();
        List<Touch> touches = getApplication().getTouchInput().getTouches();
        if (touches.size() > 0) {
            // For simplicity we will always use the first running gesture
            Touch touch = touches.get(0);

            // Deltas need to be negated to move into the direction of touch
            float touchXDelta = -(touch.getX() - mLastTouchX);
            float touchYDelta = -(touch.getY() - mLastTouchY);

            if (mLastTouchX != -1 && mLastTouchY != -1) {
                getGameObject().transform.moveBy(
                        touchXDelta * time.getTimeDelta() * MOVEMENT_CONSTANT,
                        touchYDelta * time.getTimeDelta() * MOVEMENT_CONSTANT,
                        0);
            }

            if (touch.getState() == Touch.STATE_ENDED) {
                // Reset our positions when touch ends
                mLastTouchX = -1;
                mLastTouchY = -1;
            } else {
                // Save our new positions
                mLastTouchX = touch.getX();
                mLastTouchY = touch.getY();
            }
        }
    }
}
Every Component has a set of life cycle methods that can be overridden to provide component’s functionality. In our CubeController we override the update() method. This method is called during every frame of the application’s life. Please refer to engine’s API documentation for complete list of all methods in Component class.
To respond to touch events and move the cube we use two objects from Application. These are the Time object, providing time information and the TouchInput object, which provides information about currently running touch events.
Adding another cube
To make our game little more interesting we will put a second cube into the game to move along the first one. To do this easily we’ll just add the second cube as a child object of the first cube.
In our main_scene.xml add new <children></children> tag into our <gameObject> tag of our first cube. Now add the following object into the <children> tag:
<gameObject>
    <transform>
        <position x="1" y="1" z="1" />
    </transform>
    <components>
        <component type="mesh">
            <params>
                <param name="meshPath">cube</param>
            </params>
        </component>
    </components>
</gameObject>
We do not need to add another instance of the CubeController component to this object because it is automatically moved by it’s parent. It’s transformation is only relative to it’s parent’s transformation.
Build and run the project. Your first application is now complete, congratulations!
License
Copyright 2016 Jakub Petriska

Licensed under the Apache License, Version 2.0 (the "License");
you may not use this file except in compliance with the License.
You may obtain a copy of the License at

   http://www.apache.org/licenses/LICENSE-2.0

Unless required by applicable law or agreed to in writing, software
distributed under the License is distributed on an "AS IS" BASIS,
WITHOUT WARRANTIES OR CONDITIONS OF ANY KIND, either express or implied.
See the License for the specific language governing permissions and
limitations under the License.